How Can We Help?
Configuring Navigation Menus for Suit Mag Pro
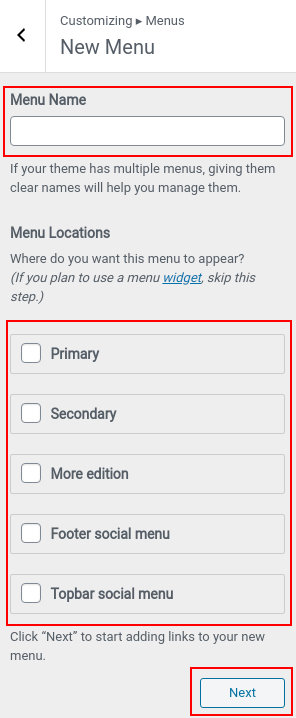
Suit Mag Pro support menu in five different locations
- Primary: It’s the main menu located just after the header.
- More Edition: It is located on the right side of the primary menu.
- Secondary: It is located on the right side of the top bar and left of Top Bar Social Menu
- TopBar Social Menu: it is located on the right side of the top bar.
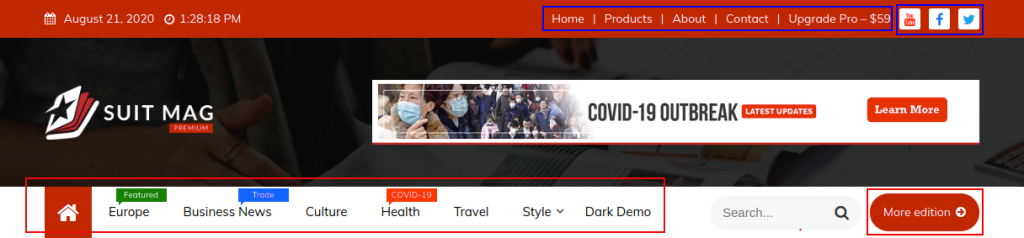
- Footer Social Menu: it is located on the right side of the footer.

Creating and assigning items to the navigation menu.
You can create a navigation menu following two methods: either by using the customizer or menus section in the WordPress Administrative Dashboard.
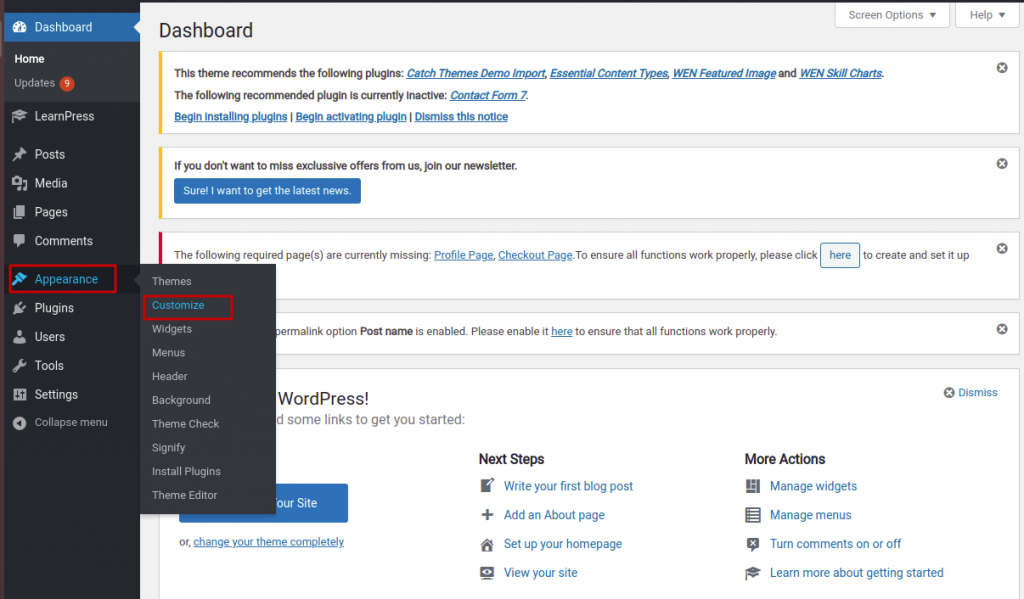
Using customizer
- Hover on the Appearance tab in the left sidebar of WordPress Administrative Dashboard. Click on the customize section.
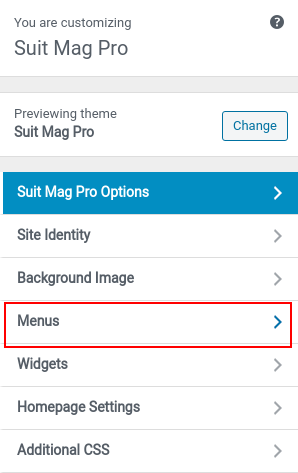
- You will get a customizer option. Now, click on the Menu tab.
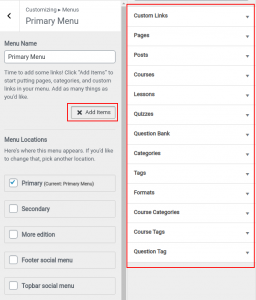
- Click on the Create New Menu button.
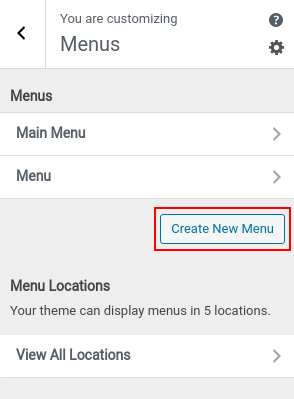
- Name the menu and select where you would like to display it, in the Menu Locations section. Click the Next button to start adding items.
- Click the Add Items button. Items arranged as per Pages, posts, Category, Tags, Custom Links, etc – will pop up at the right side of the customizer panel.
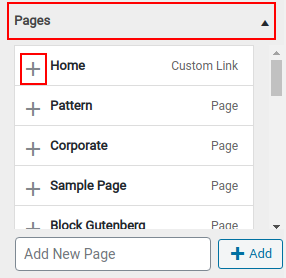
- Click the headings to expand the selection and finally click the “+” symbol to add the required items in the menu.
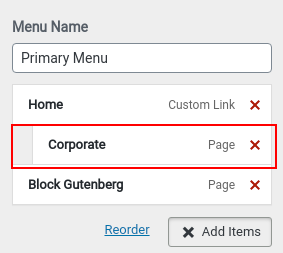
- To create a submenu, click the item and drag it to the right side.
- Repeat the procedure to create menus for all locations.
- Finally, click the publish button to save the configuration and publish it live.
Using menus section
- Hover on the Appearance tab in the left sidebar of WordPress Administrative Dashboard. Click on the Menus section.
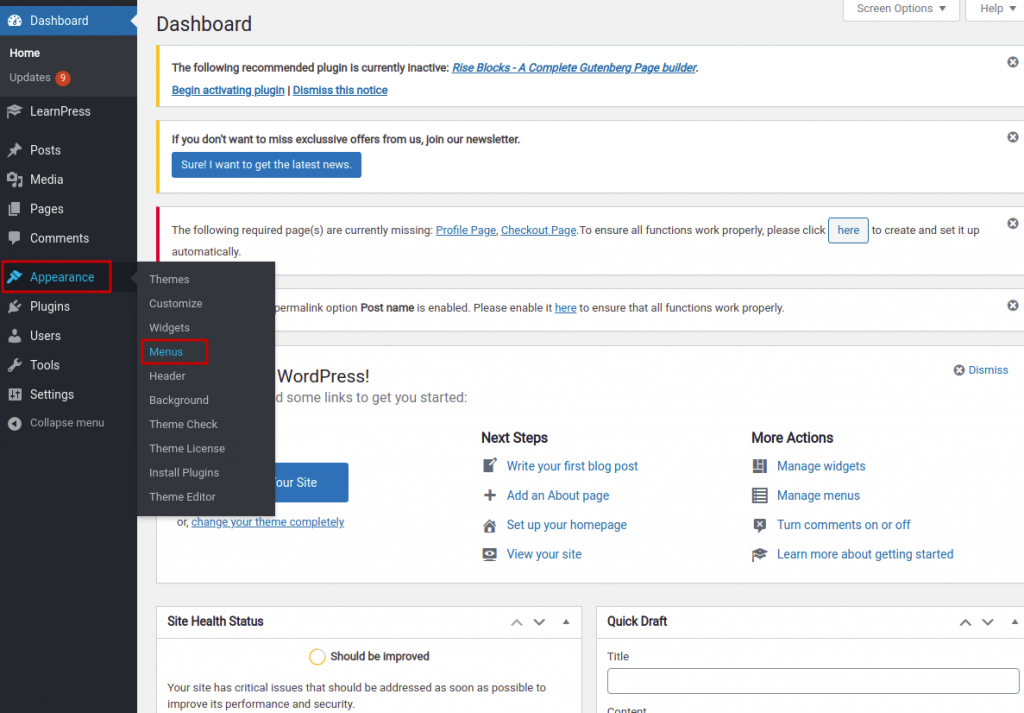
- Click on create a new menu link.

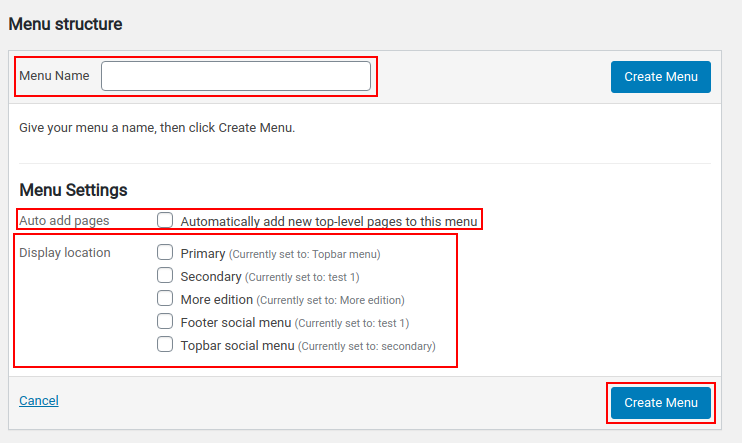
- Name the Menu and then choose the desired display location. If you would like to add new top-level pages then choose Auto add pages option. Click the Create Menu button.
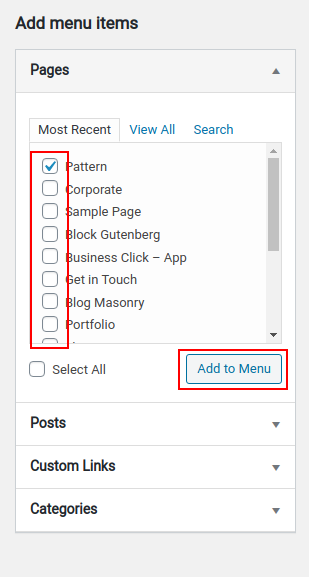
- Now choose the desired items from Add menu items’ list and click Add to Menu button to add in the menu.
- To create a submenu, click the item and drag it to the right side.
- Finally, click the Save Menu button to save it.

- Repeat the procedure to create menus for all locations.
Customizing menu
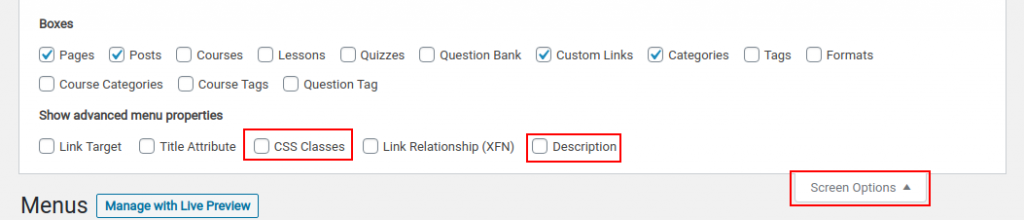
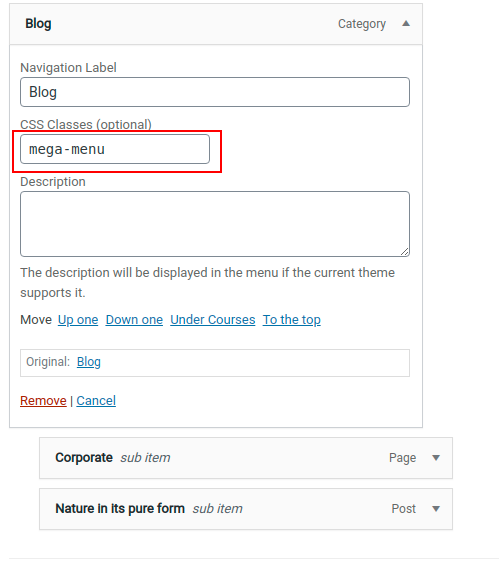
Suit Mag Pro supports customization for the primary menu. Before working with customization, you need to activate CSS Classes and Description for the menu.
For this, click on the Screen Options button found at the top – right of the Menus page.
Tick the options for CSS Classes and Description under show advanced menu properties.
You will now get the option to insert css class and description when the item is expanded.
Here’s the list of customizations:
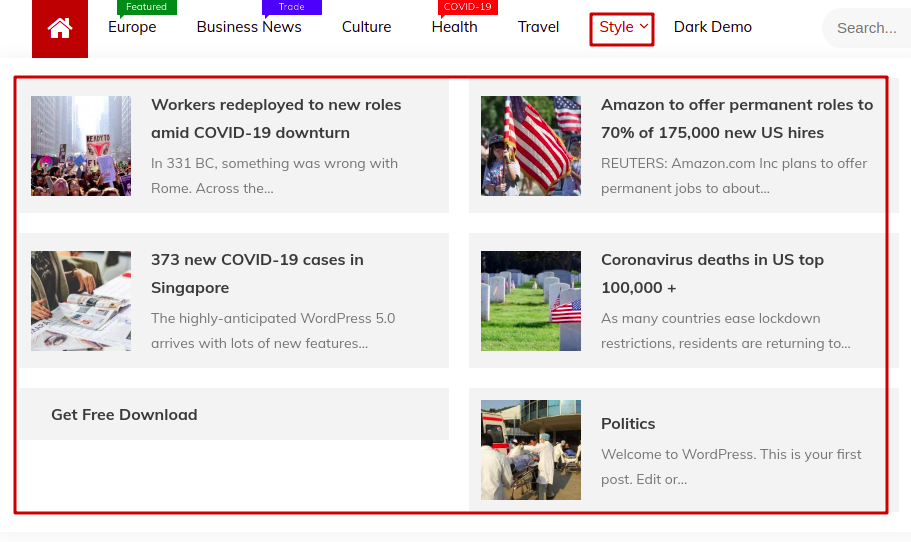
Adding Mega Menu: Expand the top-level parent item. Write “mega-menu” in CSS Classes.
output:
Home icon instead of text: Expand Home. Write “home” in CSS Classes.
Add tag in the menu item: Expand the item. Write “tag” in the description and “color name” in the class.
